Creating in the Myst of Chaos
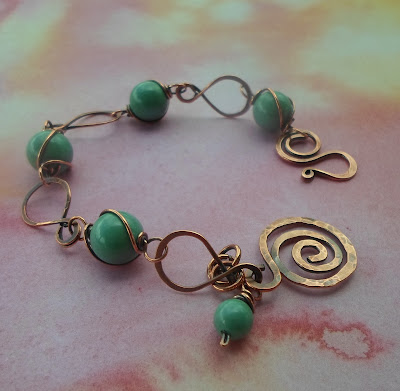
This is the actual color of the bracelet, jade green. Some of the pictures below show it as blue, but that is because I took some of them during my work process and not in natural light.
I was going through jewelry creating withdrawal symptoms. There's still so much to do to get ready for my move. There are boxes taped and stacked, pictures and mirrors wrapped, yet, there is more to do. The stress of an incomplete task was making me cranky and restless. So I decided to take today as a vacation day. Yes, I dug out my tools and materials and escaped the chaos of my home transition. Here are lots and lots of pictures of my days escape and an overview of my process.
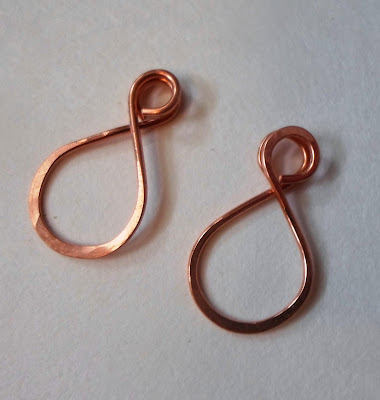
I decided I wanted to create a new link for the beads on a bracelet. This picture shows how a slight variation in the length of wire, yet the same mandrel, can create different results. The link to the left is very round, the center is closer to the teardrop shape I was aiming for, and finally with a smaller connection link I achieved what I was wanting.
Then I experimented with the original round wire and then a hammered wire. I decided the hammered wire link had a nicer appearance.
The next experiment was to hammer the top smaller loop. I like this result.
The easiest way to achieve the top loop being hammered is to hammer it in the straight stage (top of picture)
After I completed the shape I hammered the bottom portion of each link.
After all of the connector links were made I began wire wrapping the Swarovski pearls.Wrap, wrap, wrap.
I made a clasp, spiral charm and small pear drop. This is the bracelet in the raw copper stage.
I then oxidized the bracelet and the other pieces I made today. Here is a picture of the bracelet in the oxidation stage, but it hasn't been polished.
Here's the bracelet with after all of the rubbing to remove the excess patina and polished in it's final stage.
These are earrings to compliment the bracelet, still incomplete. They need to be polished, tumbled and ear wire added to them.
Today, I started with these earrings as a project. I think they will be great once I polished, tumble and add ear wires.
I experimented with a Herringbone Weave for some adjustable rings. I can't wait to see them polished and tumbled.
This style ring is a staple on my display. The ladies love these simple rings. Of course they look much better once polished and tumbled.
I don't plan on getting rich with my little business, but I do plan to have continued fun. It takes so long to get a piece of jewelry completed and ready to be sold. I think I make minimum wage, or at least I hope I do.
A group picture. At the end of day one I made quite a bit of jewelry. I'll put the finishing touches on them tomorrow. They still need to be buffed, polished, tumbled, photographed, with descriptions written, and posted in my on line shop.
After the bracelet has been oxidized (and turned black) the excess must be removed with fine steel wool.
Half way there...rub, rub, rub...
Rub, Rub, Rub
Finally, the excess has been removed. Now it goes into the tumbler for about 45 minutes to work harden the wire and give it a final polishing. Then more pictures of the final bracelet, so it can be listed for sale in my on line shop at www.lindasinish.etsy.com.
And, finally it's listed for sale here.
Now, I've got to get back to packing and sorting. I'm hoping that the settlement date for the sale of my current home will be scheduled soon.
Thank you for visiting my blog.
Have a joy filled and creative day,
Linda


Hiç yorum yok:
Yorum Gönder