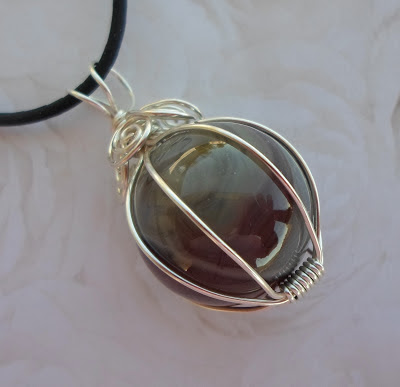
Wrapping a Marble Pendant - Free Tutorial
If you follow me on Facebook, you already know that this project has been very frustrating for me. However, once I found the right technique it became increasingly easier with each completed pendant. (I bought 12 marbles and made 11 pendants. One marble was defective.) So I decided that I would take a ton of pictures of the process and write a tutorial.

This all began with a lovely road trip with my friend Tammy. It started off as a girls day out. Of course we got hungry and started to look for the most perfect place to sit down for lunch. After we parked in Buckhannon, WV, we started to walk to the restaurant and a giant magnet drew us toward an antique store. Well my friends, that was the beginning, for there on the floor were bins full of hand blown marbles. Bright, happy marbles. I was hooked. I had no idea what I was going to do with them. I just knew that I 'must' have them.

Then came the task of turning them into pendants. At first I went with my standby of the round cage, but without a drilled center I was stumped for the bail. Plus, the wire just wasn't working, not enough, too much and finally I realized it was to heavy of a gauge. I was frustrated. But, after I changed gears, i.e. the design, my frustration eased. I will warn you that the slick marble does like to slip around and takes on a life of it's own and has a tendency to fly out of your hands until it is trapped in the wire. After I made a few, it became a breeze. It just takes some experience with understanding what to expect with the slick marble. By the time I was making my third pendant it became second nature.
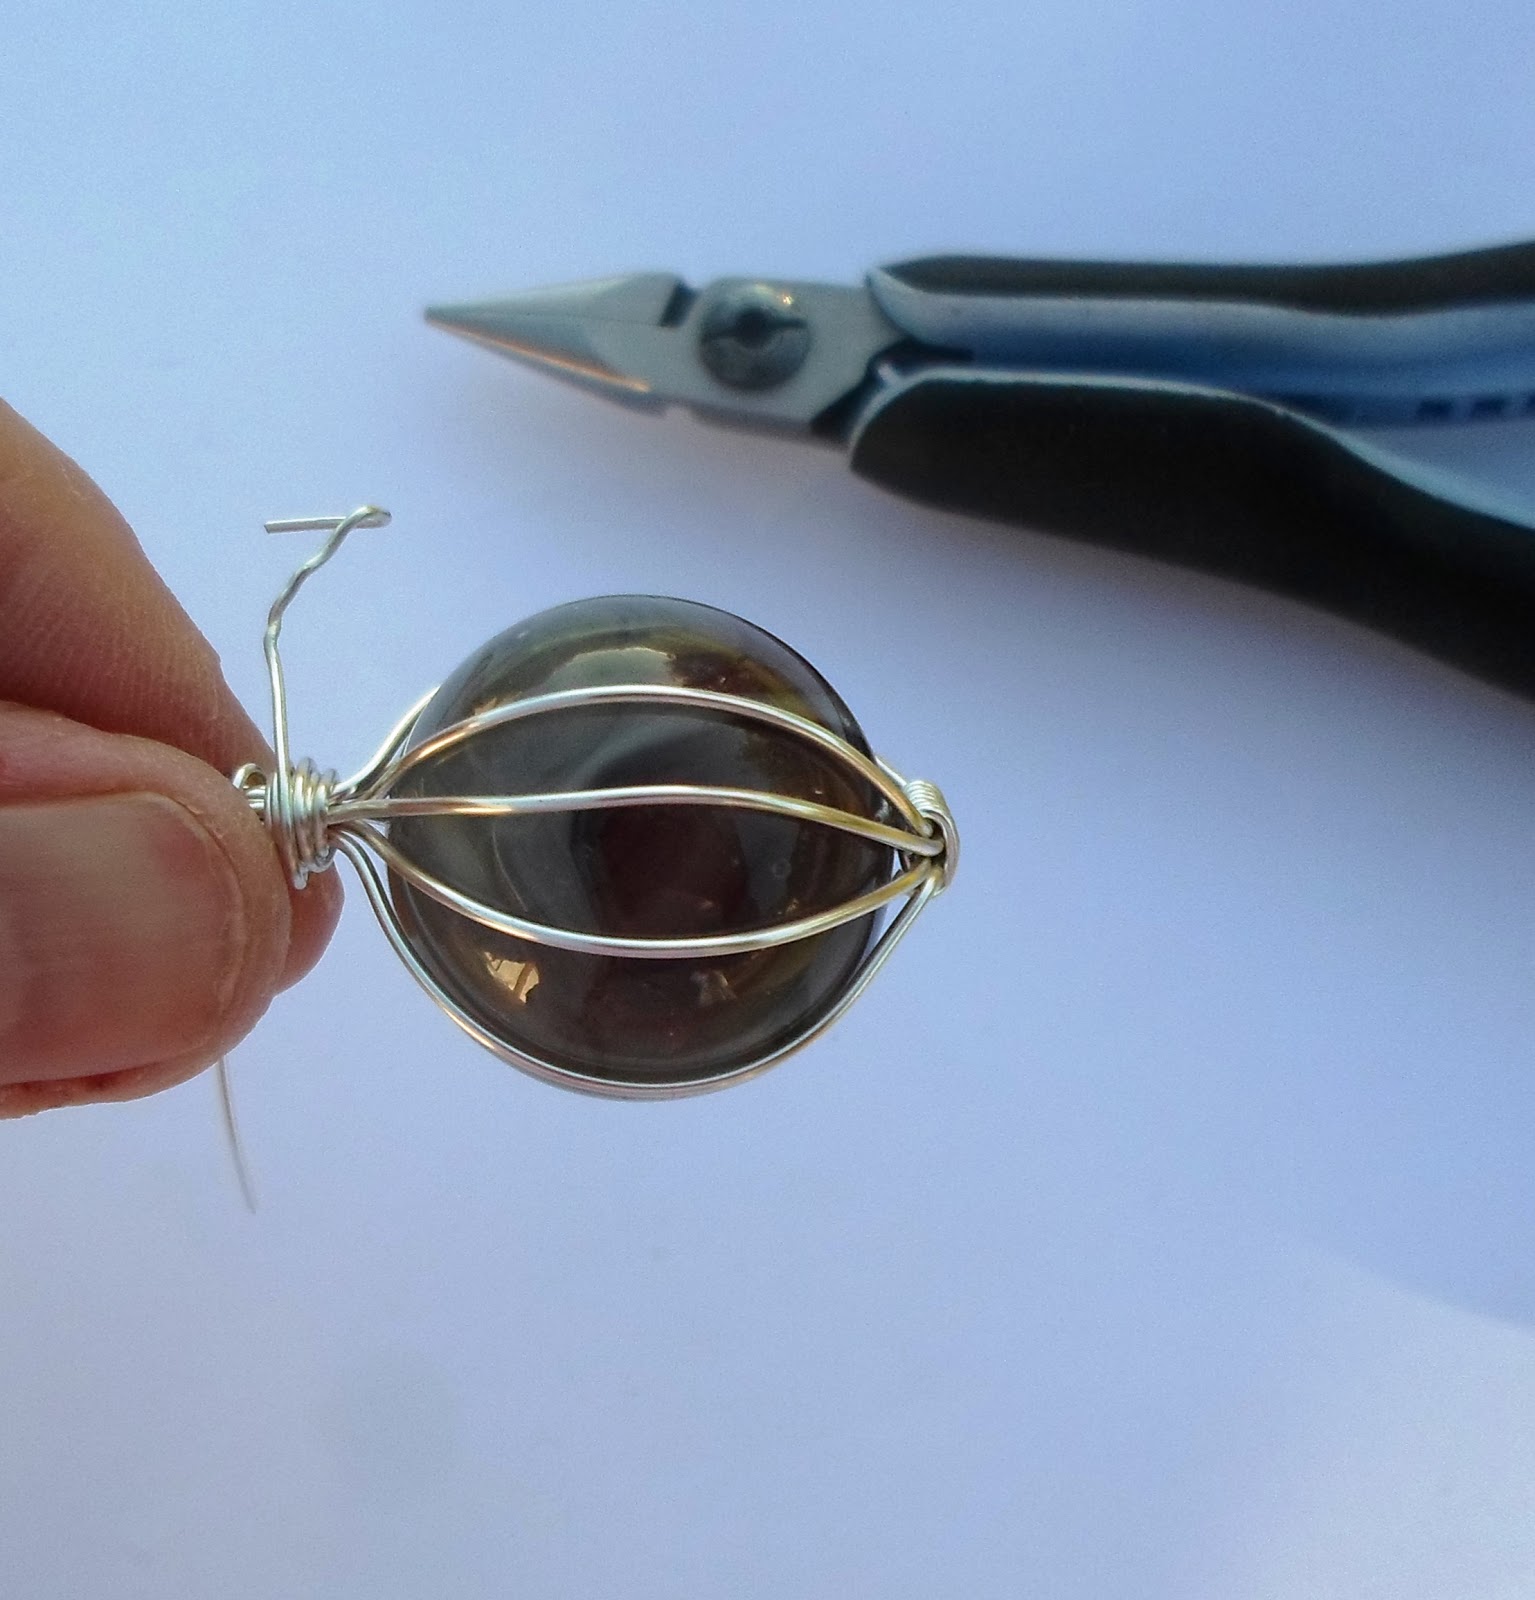
Don't worry too much about the spacing of the side wires. As you create your pendant, there will be many opportunities to move the side wires to where you want them to be. Even at the very end of the tutorial.


This all began with a lovely road trip with my friend Tammy. It started off as a girls day out. Of course we got hungry and started to look for the most perfect place to sit down for lunch. After we parked in Buckhannon, WV, we started to walk to the restaurant and a giant magnet drew us toward an antique store. Well my friends, that was the beginning, for there on the floor were bins full of hand blown marbles. Bright, happy marbles. I was hooked. I had no idea what I was going to do with them. I just knew that I 'must' have them.

Then came the task of turning them into pendants. At first I went with my standby of the round cage, but without a drilled center I was stumped for the bail. Plus, the wire just wasn't working, not enough, too much and finally I realized it was to heavy of a gauge. I was frustrated. But, after I changed gears, i.e. the design, my frustration eased. I will warn you that the slick marble does like to slip around and takes on a life of it's own and has a tendency to fly out of your hands until it is trapped in the wire. After I made a few, it became a breeze. It just takes some experience with understanding what to expect with the slick marble. By the time I was making my third pendant it became second nature.
Don't worry too much about the spacing of the side wires. As you create your pendant, there will be many opportunities to move the side wires to where you want them to be. Even at the very end of the tutorial.


Tools: ruler, flush cutters, round nose, chain nose, wire straightener, flat nose, stepper

Materials
Wire: 20 gauge and 22 gauge. I used silver plated and later bronze
1 24mm marble

Cut 4 pieces of 20 GA at 8" each
Mark with a Sharpie at 4"
Cut 2 pieces of 22 GA at 6" each
Mark with a Sharpie at 1"

Hold all 4 pieces of the 20 GA wire
Wrap (bind) at the 4" Sharpie mark with the 22 GA wire
I usually wrap about 5 or 6 times

Here's a close up of the completed wrap (binding)
Now use the flush cutters to trim the wire ends off
The cut ends should be on the same side of the binding
Use the flat nose or chain nose to push the end down flat

Bend the 8 wires at the wrap (binding) to form what looks like a spider web
This will keep the wire from sliding out of the wrap (binding)

The 24 mm marble will go on top of the wrap (binding)

Hold the marble in place
Center on top of the wrap (binding)

Hold the marble securely to keep a good hold to keep the marble from moving

Hold firmly so the marble doesn't escape
Use you other hand to press the 8 wires snugly next to the marble
Be aware to keep the marble centered on the bottom wrap (binding)

Check the bottom to make sure the wrap (binding is still centered)

Here's a side view to show that the bottom wrap (binding) is in alignment with the top wires

Use your fingers to press the top 8 wires into and next to the marble
Be aware that the marble remains in the center of the top wires and to bottom wrap (binding)

I use my finger or thumb nail to press the wire onto the marble and to gather the 8 wires in a bunch on the top of the marble
This is another opportunity to check that the bottom wrap (binding) is in alignment with the top gathered wires

Place the 1" section of the 22 GA wire in your holding hand
Use your other hand to wrap the remaining 5' of 22 GA wire around the 8 top 20 GA wires
Wrap around 4 or 5 times, then wrap over top of this wrap to make a chunky wrap

This wrap will be loose
Don't worry, it will be tighten down soon
Trim off the loose ends with your flush cutters
Use your chain nose pliers to push down the ends

Push the wrap down to the marble and hold it in place
From the top of the wrap, measure and trim 6 of the top wire to 1 3/4" each
Leave the remaining 2 top wires at their original length

Push the wrap as close to the marble as you can and hold it in place
Bend the 6 wires that are 1 3/4" long to the side
The bend should be as close to the top of the wrap as possible

Use the tip of the round nose pliers to make a very small u shape, almost a close loop on all of the 6 wires that have been bent to the side
The loops should all be facing the same direction
You now have something that looks like a satellite

Use your chain nose pliers to make an open spiral on one of the 6 looped wires
Make sure the open spiral comes all the way and touches the group of wire

The open spiral is sticking out like a wing and not touching the marble

Now you can press the open spiral down to touch the marble

At the wire that is next to the open spiral that you just made
Use the chain nose pliers to make the second open spiral
It needs to touch the group of center wires
It needs to be out in the air like a wing
Now adjust this second open spiral so that 1 or 2 of it's outer wires is over lapping 1 or 2 of the outer wires of the previous open spiral

Now push this second open spiral down
It will be partially over lapping the previous open spiral
It will be touching the marble

Continue these step with the remaining wires
This picture shows 5 of the 6 open spirals made and 1 more wire ready to be formed

Use you chain nose pliers to make your last open spiral
Here in this picture it is almost completed
It is touching the 2 remaining wires
It is out in the air like a wing
You can now press this final open spiral down to partially over lap the previous open spiral and to touch the marble

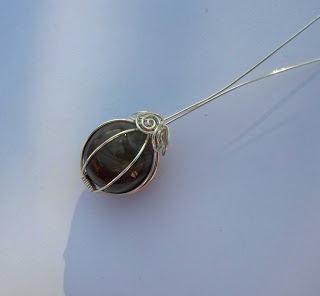
This is a top view of the marble with all 6 open spirals complete
The 2 remaining wires will now be formed into a bail for the cord or chain

Here's another picture of the marble with the 6 open spirals

We are now going to make the bail
Place the chain nose pliers about 1/8" above the open spirals
This placing should be enough for 4 pieces of wire thick

Bend the 2 remaining wires back over the chain nose pliers

Place the bail making pliers as near to the bend as possible

Bring the 2 wires up and over the bail making pliers and toward you

Continue moving the wire around the bail making pliers to form a loop

Center the loop over the core wire
Your loop will now be on top of the core wire and centered

Wrap the 2 wire ends around the core wire

Wrap around the core wire a second time

Your wrap should like this

Flush cut the remaining wire ends off as near to the wrap as you can

Use the chain nose pliers to push the end of the wire as close to the wrap as you can

Open the double wire bail, using your flat nose pliers
Adjust any wire that needs to be centered or to move the side wires to give them equal distance from each other

Here's the final pendant

Group Hug!!!
I hope that you have enjoyed this tutorial and you will make many pendants for yourself, for gifts or to sell. Happy creating!!!
By the way. For those of you who have been following my blog. I'm still waiting on the bank to schedule the sale of my home so I can move. I'm hopeful that I'll be moving in the next 2 or 3 weeks.
Have a joy filled and creative day,
Linda
Hiç yorum yok:
Yorum Gönder