Tutorial: Hoop and Squiggle Earrings
In my quest for the ultimate pair of earrings I sometimes design them myself. However, I'm not the only one making earrings. There are many talented wire artists out there that are unbelievably talented. When I discover their creations I set a goal to reproduce the items. Sometimes I'm successful, sometimes I fail royally and sometimes the design takes on a life of it's own and turns out completely different from the original design.
I found this design on Pinterest, my latest favorite web place. There are a lot of potential variations for this design. Here are a few ideas, 1) Use 2 different metals, i.e. antiqued copper and silver, 2) wrap a bead or crystal at the top and then add this unit, 3) add some seed beads to the top squiggle on the unhammered sections of wire, 4) use twisted wire on part or all of the components. I bet there are other variations. I hope that you will enjoy this tutorial and I hope that it's clear.
Hammer more to give the wire a flattened look.
Continue wire around to form a partial open spiral.
The beginning tip of the wire is now facing downward.
The remainder of the wire is horizontal.
Insert the back of the SRNP. The bottom mandrel will be touching the beginning spiral. Make a wrap around the top mandrel until the wire is going the opposite direction and is horizontal, yet touching the wire below.
Insert the small mandrel of the LRAT. The LRAT is flush and touching the side of the beginning spiral. Make a wrap around the small mandrel until the wire is going the opposite direction and is horizontal, yet touching the wire below.
Use the middle of the SRNP and make a loop going downward on the end of the wire. This will be your hanging wire.
I found this design on Pinterest, my latest favorite web place. There are a lot of potential variations for this design. Here are a few ideas, 1) Use 2 different metals, i.e. antiqued copper and silver, 2) wrap a bead or crystal at the top and then add this unit, 3) add some seed beads to the top squiggle on the unhammered sections of wire, 4) use twisted wire on part or all of the components. I bet there are other variations. I hope that you will enjoy this tutorial and I hope that it's clear.
Materials
18 Ga wire
2 pieces at 3 ¼”
2 pieces at 4”
2 ear wires
2 ear chucks
Tools
Flush cutters
#20 = 20mm mandrel (about 3/4” in diameter)
Large Rap and Tap (LRAT)
Small Round Nose Pliers (SRNP)
Hammer
Bench Block
Sand Bag or Towel
Hoop
3 1/4” wire
Make hanging loop using middle of SRNP
Wrap wire around the 20mm mandrel with the hanging loop outward.
Your wire should wrap around the mandrel a tad bit more than the mandrel.Wrap wire around the 20mm mandrel with the hanging loop outward.
Hold with fingers to maintain shape.
Hammer lightly at first to work harden to maintain shape.
Hammer lightly at first to work harden to maintain shape.
Hammer more to give the wire a flattened look.
Reshape on mandrel if necessary
Squiggle
4” wire
Start wire on the back of the SRNP.
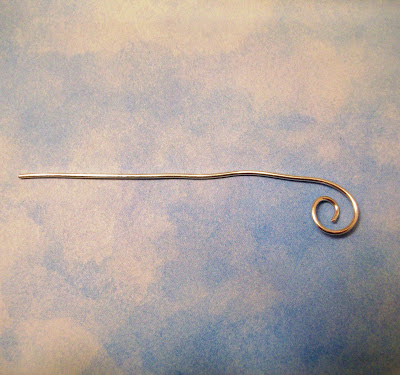
Make a partial loop – about 80% - leave a gap.Continue wire around to form a partial open spiral.
The beginning tip of the wire is now facing downward.
The remainder of the wire is horizontal.
Insert the back of the SRNP. The bottom mandrel will be touching the beginning spiral. Make a wrap around the top mandrel until the wire is going the opposite direction and is horizontal, yet touching the wire below.
Insert the small mandrel of the LRAT. The LRAT is flush and touching the side of the beginning spiral. Make a wrap around the small mandrel until the wire is going the opposite direction and is horizontal, yet touching the wire below.
Use the middle of the SRNP and make a loop going downward on the end of the wire. This will be your hanging wire.
Use the middle of the SRNP and place it next to the end loop so it is flush or touching the end loop. Bend the first or handing loop up and over this loop.
Use your hammer to work harden the entire squiggle. Hammer the curves an extra bit to give it some shape.
Place the squiggle on top of the hoop and if necessary use your fingers to adjust the size to match the other earring.
Now its time to add the ear wire.
I hope that you have enjoyed this tutorial and perhaps used one of the suggested variations.
Thank you for stopping by my blog. Have a joy filled and creative day! Linda
Now its time to add the ear wire.
I hope that you have enjoyed this tutorial and perhaps used one of the suggested variations.
Thank you for stopping by my blog. Have a joy filled and creative day! Linda


Hiç yorum yok:
Yorum Gönder