Wearing My Heart On My Sleeve Bracelet Tutorial

Many years ago I saw a picture of a bracelet made of many wire hearts linked together, similar to chain maille. I believe it was made from 14 or even 12 gauge wire and I believe it was a piece by Lynn Merchant. Then my friend Jeanette Blix made a version of the bracelet. I had bracelet envy. I made my own version using 18 gauge wire. It was okay, but not magnificent, even tho I received many compliments. I decided, once again, to make this bracelet, but this time I used 16 gauge wire. I like the result. Maybe, just maybe, one day I'll tackle this project in even heavier wire.
For those of you who would like to make this bracelet, I'll do my best to write the tutorial. Please let me know if you have any questions.

Use your heavy duty flush cutters for 16 gauge wire. This heavier wire will damage your regular flush cutter and that will make you very sad.

Use 16 gauge dead soft copper wire. Flush cut 40 pieces, each 2" long. After they are cut, I like to line up several together. Or, you can do the next step individually.

I hold the pieces or piece in place with my non-dominate hand.

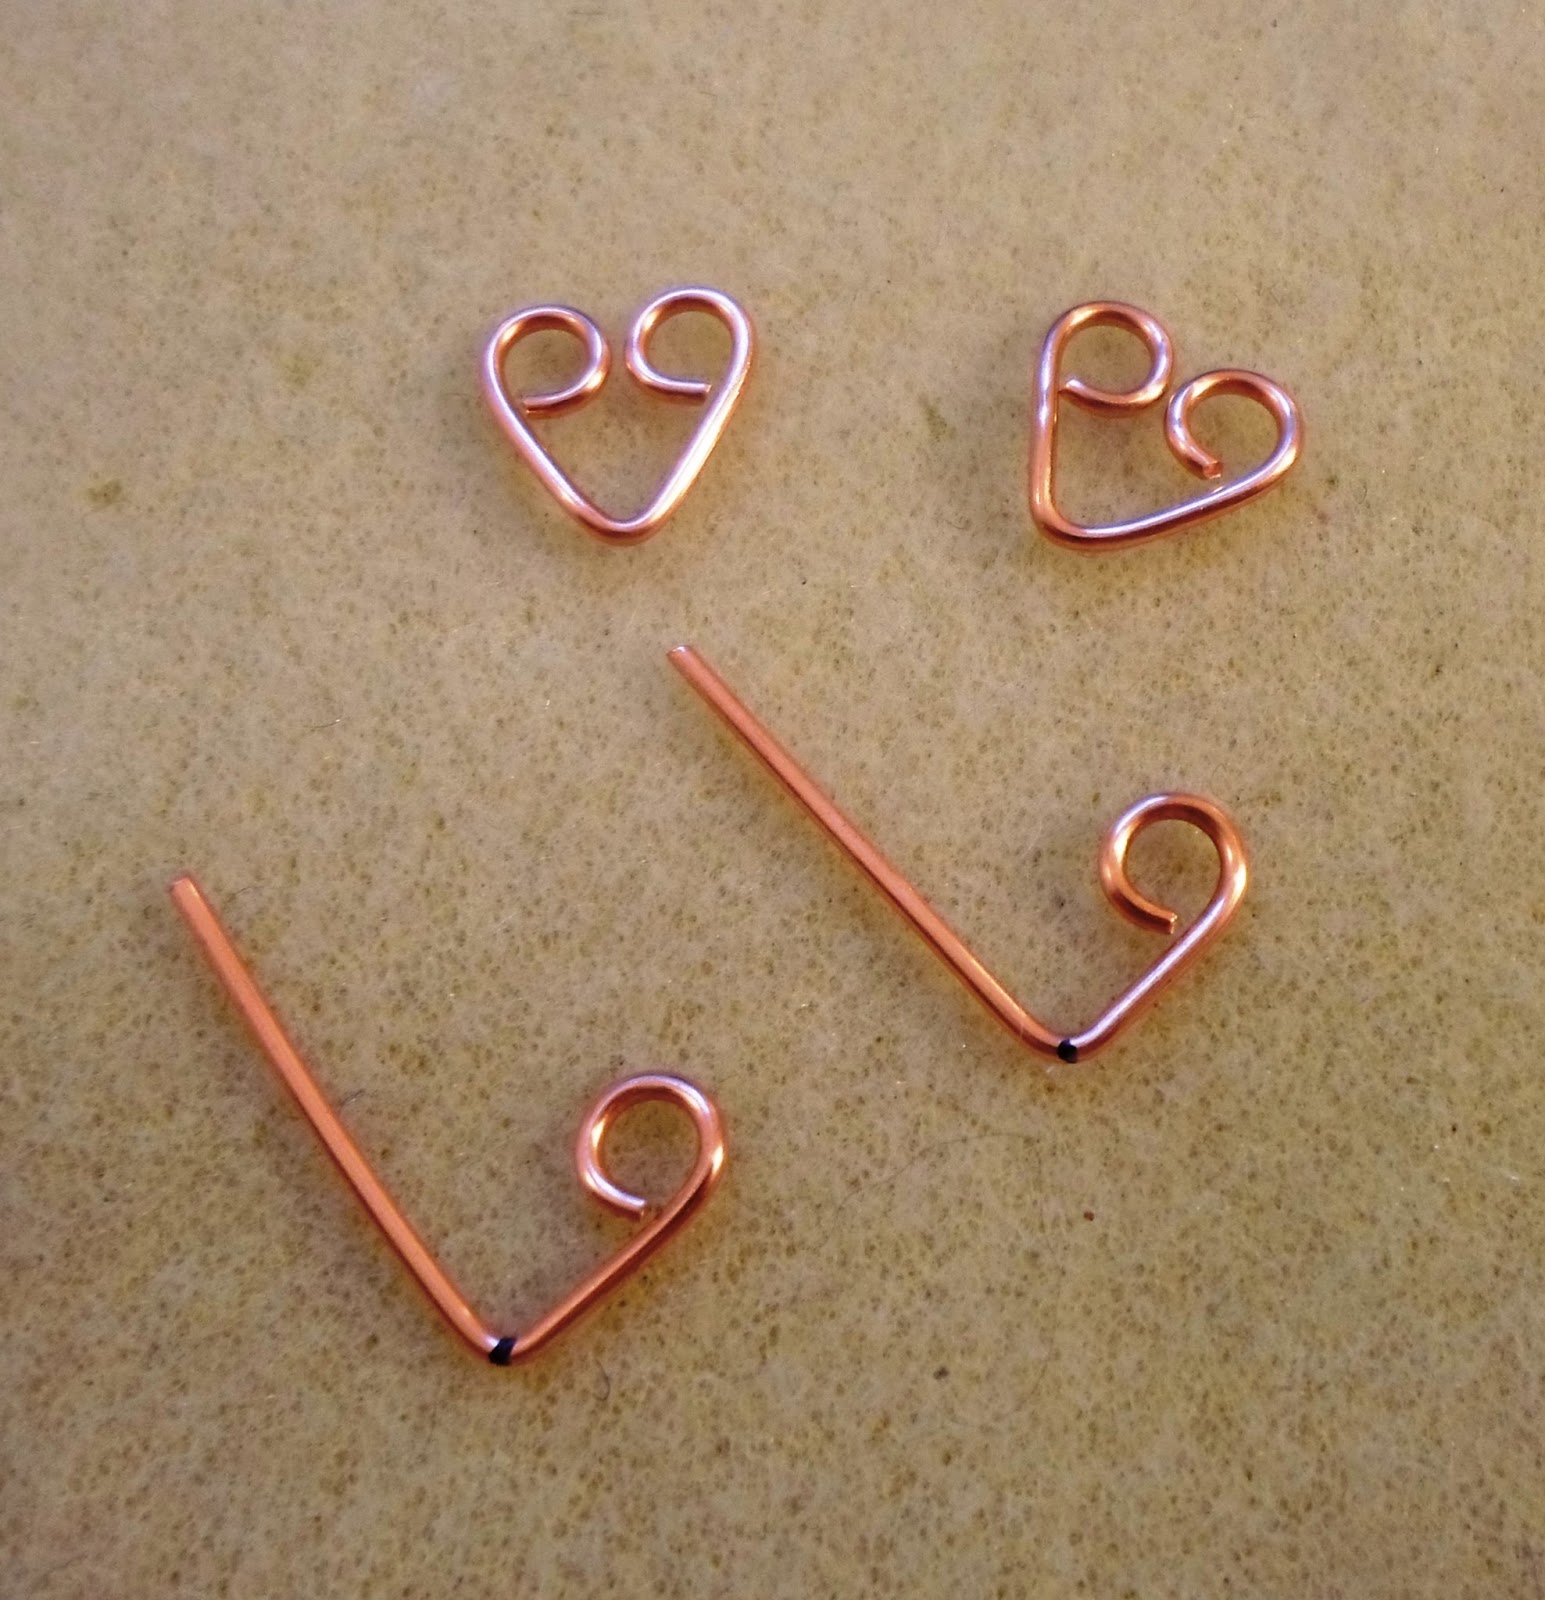
Use a Sharpie to mark the middle of each piece.

Place the blade of the flat nose pliers next to the mark. Place your thumb of your non-dominate hand on the wire close to the pliers and push up to form a 90 degree angle.

Here's your shape.

Now repeat, until all of your 2" wires are bent.

Place the very tip of a wire in the back of your round nose pliers.

Turn your hand to form a complete circle. Hold your thumb of your non-dominate hand on the wire close to the pliers and apply pressure to create a tight uniform circle.

Here's what you will have ~ Sorry about the blurr.

Go ahead and get all of your links started.
Use the back of your round nose pliers to make loops on (only) two of your links to form 2 hearts. Take your flat nose pliers and use them to flatten and align your first 2 hearts.

Align one heart on top of the second heart.

Pick up a 3rd link and thread it through the loops of the 2 formed hearts.

Use the back of your round nose pliers to form the 3rd heart. Align the heart with your flat nose pliers.

Pick up your 4th link and thread it through the loops on the opposite side of the first set of hearts.

Use the back of the round nose pliers to make the finishing loop to form your 4th heart. Use the flat nose pliers to align the wire.

Here is a picture of your 1st 4 hearts, aka 2 sets of hearts.

Now just keep repeating the process.

Here's another picture of how 3 sets of hearts are linked together.

Once you have completed your chain, add 2 jump rings, one through each set of heart loops. Then add a 3rd jump ring to join these 2 jump rings into a triangle. This 3rd jump ring will be used to connect your clasp.
Add one or several jump rings on the other end of your chain.
If you have used copper wire, you can leave as is, or apply liver of sulfur to give it a warm aged look.
Perhaps my next bracelet will be made from silver wire or bronze wire, or, or, or...
Thank you for visiting my blog. I hope that you have enjoyed this tutorial.
Have a joy filled and creative day ~ Linda
Hiç yorum yok:
Yorum Gönder